The important stuff you need to know about rotator cuff injuries.
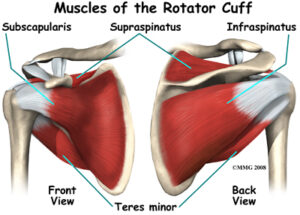
The rotator cuff is a very important group of four small muscles (supraspinatus, infraspinatus, subscapularis & teres minor) that connect the upper arm to the shoulder blade (see image). Their main role is to not only move and control movements of your shoulder but to also provide dynamic stability to the shoulder joint.
Unfortunately, rotator cuff tears, which can occur to any one of these muscles, are one of the most common causes of shoulder pain and disability in both the sporting and general populations and can make everyday tasks increasingly difficult and often very painful.
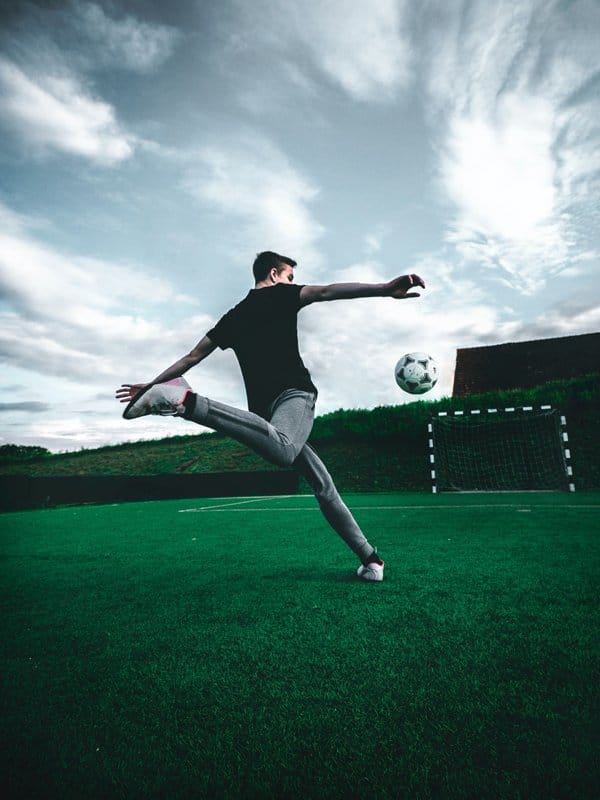
Research has shown that the risk of developing a rotator cuff tear increases with age. Jobs and sports that require repetitive overhead work also increase the risk of rotator cuff injury. Jobs such as construction, carpentry, electricians and painters as well as sports that require overhead movements such as swimming, baseball, cricket and volleyball can all predispose the shoulder to injury.
How do rotator cuff tears occur?
Rotator cuff tears generally develop as a result of either:
Traumatic events – Such as a fall onto an outstretched arm or lifting a heavy object
Non- traumatic events – Such as excessive repetitive use or normal age related wear and tear
How do I know if I have a rotator cuff tear?
Symptoms of a rotator cuff tear can vary from person to person, however, common findings include:
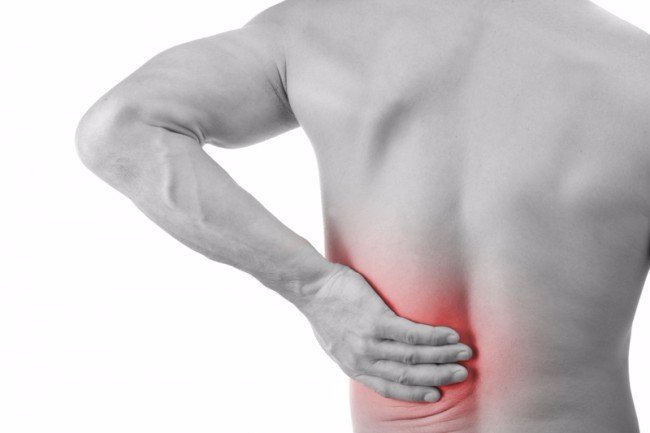
Pain on the side or back of the shoulder
Pain in the upper arm.
Reduced shoulder movement and pain associated with overhead tasks such as changing a lightbulb or reaching for the top shelf of a kitchen cabinet or other tasks such as reaching behind your back or out to the side.
A feeling of weakness with shoulder movements
Pain sleeping on the affected side
Should I get a scan?
Imaging studies, both Ultrasound and MRI, have shown that the prevalence of rotator cuff tears in asymptomatic (symptom free) individuals is approximately 50% in those aged between 40 to 60 years of age, and as high as 80% in those older than 80 years of age. (Harris et al, 2012). This means that if a tear is present on an ultrasound or MRI it may just be due to the natural ageing process and not related to your shoulder symptoms at all.
If you have shoulder pain and are unsure whether you require imaging, your physiotherapist will be able to determine if your pain is caused by the presence of a tear or any other underlying factors.
How can physiotherapy help?
Research has shown that physiotherapy management, specifically strength training, should by the first treatment option for rotator cuff injuries (Ladermann et al, 2015; Ainsworth et al, 2007; Collin et al, 2015).
Rotator cuff tears account for over 50% of all shoulder conditions seen by physiotherapists on a regular basis (Donatelli, 2011).
The first thing that we will determine is whether your symptoms are in fact due to a tear to the rotator cuff. This is achieved by a thorough assessment of your shoulder, neck and upper back including:
A detailed history of your injury
Clinical examination of your shoulder movements and strength
Special orthopaedic shoulder tests
Examination of your neck and upper back movements
Palpation of your shoulder muscles and surrounding structures
Determine if imaging is required
Determine if you need to see an orthopaedic specialist
Set specific, individualised rehabilitation goal
What does treatment entail?
A 1 hour initial consultation is recommended for your first session. After your assessment, treatment may include:
Treatment and advice for pain reduction
Hands-on manual therapy for restoration of normal shoulder movement
Restoration of normal neck and upper back movement
You’re at home, you reach down to pick up your shoes and “bang” you get this sudden, crippling back pain. You call your physio/chiro/osteo/doctor. They assess you and say that you probably have a slipped disc or a disc bulge and that you need an MRI. You go home, jump on the world wide web and are confronted with all sorts of pictures showing discs pushing on nerves. Every website you read says that you may need surgery and you should be avoiding heavy lifting, bending and twisting. Sound familiar?
There are 3 main problems with the above scenario.
1. Scans rarely add value.
Patients symptoms rarely correlate with what we see on their scans . A systematic review by Brinjiki and colleagues in 2014 looked at all the studies published on asymptomatic people i.e. they had no symptoms or history of symptoms. They found that all the studies regularly reported disc problems in pain free subjects.
30% of all 20yr olds had a disc bulge and no pain. This percentage increased with age, with over 60% of 50yr olds having a disc bulge, and these are people who had no symptoms whatsoever. We also regularly find that patients with acute, crippling low back pain have no evidence of acute tissue damage on MRI.
A study in 2015 (Fritz and colleagues) also found that back pain patients who had an MRI or CT scan spent up to $5,000 more on rehabilitation compared to those who didn’t . The reason for this is multifactorial and mostly is the result of “Pathologisation” (which we will talk about in a later post).
So having an x-ray, MRI or CT scan for your back pain will in most cases be a waste of your time and money. (The only exception to this rule is if you have signs or symptoms suggesting serious pathology like a fracture OR if you have constant pins and needles, numbness and weakness in a dermatomal distribution).
2. Disc bulges are more likely to cause leg symptoms rather than back pain. If you have back pain, and no leg symptoms, it is unlikely that a disc is the cause of your symptoms. The reason is that the disc itself is actually very poorly innervated (Garcia-Cosamalon and colleagues 2010) meaning that the disc itself does not contain a lot of sensory nerve fibres. It will really only start to cause you grief if it starts to contact and compress the nerve root. If it gets to this point, you may have pins and needles, numbness, weakness of the area supplied by the nerve that is affected. Even at this stage we can reliably diagnose it without the use of scans.
Patients with true disc bulge symptoms will most likely present to the clinic complaining of leg symptoms but no back pain.
3. Avoidance of movement can result in poorer outcomes . By all means avoid heavy lifting until your pain settles but there is no reason, nor any evidence, to suggest that avoiding bending or avoiding twisting will help healing or speed recovery. We actually know that stiff spines are painful spines so avoidance of specific movements can result in reduced mobility and reduced strength in the long term . Getting moving early, and recovering your mobility and flexibility early, with the help of a competent clinician, is the most effective treatment.
So if the above story sounds like you, don’t panic! Approximately 95% of patients with acute low back pain who present to a competent physiotherapist recover completely within 4 weeks, most even sooner.
If you’re reading this and have already had an MR or CT scan, remember these findings are normal and most likely are not the cause of your pain. Low back pain is multifactorial, so having it assessed by a competent practitioner is the fastest way to get you moving again.
Medial Tibial Stress Syndrome (MTSS) or “shin splints” is one of the most commonly reported lower limb injuries by competitive and recreational athletes. Recent research has shown that shin splints affects approximately 20% of the running population, with the majority of sufferer’s partaking in long distance training/competition.
What causes the pain?
Currently, there is two widely accepted theories on the cause of shin splints:
The bony bending/bowing theory
The traction theory
The bony bending theory suggests that during running, the Tibia (shin bone) bends due to the stress placed upon it. This bending causes small amounts of strain in the bone that enables it to adapt and get stronger (a good thing!!). When this strain exceeds the adaption process the shin bone becomes overloaded (a bad thing!), subsequently leading to injury and pain.
The traction theory states that shins splints is caused by the continual contraction of the muscles (Soleus, Flexor Digitorum Longus & Tibialis Posterior) that attach to the inner border of the shin. As these muscles contract during running, they place a traction stress on the shin bone, which results in inflammation at their attachment onto the bone, causing pain.
Am I at risk?
Current research has identified several risk factors leading to an increased likelihood of developing shin splints. These include:
A previous history of shin splints
Prior orthotic use
High Body Mass Index (BMI)
Female gender
Decreased running experience
Decreased running cadence (step rate)
Excessive pronation
Over striding
Crossover running style
Increased vertical oscillation (ground clearance)
Forefoot running
How do I know if I have shin splints?
To diagnose shin splints accurately, two symptoms must be present:
Exercise induced pain along the distal 2/3 of the medial Tibial border
Recognisable pain produced by pressing the medial Tibial border, which spans a distance of 5cm or more.
If you are experiencing symptoms not typical of shin splints such as cramping, pain spanning less than 5cm, burning pain, numbness or pins and needles, you should seek a thorough assessment by a physiotherapist to properly diagnose and treat your condition.
Treatment – Technique Technique Technique!!!
Arguably one of the biggest contributors to the development of shin splints in a runner is their running technique, particularly their lower limb mechanics. One of the quickest ways to reduce shin splints related pain is to address the technical aspects of running that can contribute to increased stress across the Tibia and associated musculature. What you should focus on is:
Cadence – Normal cadence should be between 165-185steps/min. Decreased Cadence causes increased ground contact time resulting in prolonged pronation and excessive tibial torsion stress.
Over striding – Excessive stride length results in poor tibia positioning upon heel strike, increasing Soleal traction and reducing force absorption ability.
Cross Over Gait– Landing across the midline of the body causes excessive tibial torsion and pronation, reducing proper force attenuation.
Vertical Oscillation– Increased vertical oscillation during running increases Tibial impact forces and often results in a loud foot strike.
How do I improve my technique?
Increase your cadence!! – This is by far the biggest bang for your buck. Increasing your cadence by approximately 10%:
Reduces lower limb impact forces by 20%
Reduces vertical oscillation
Reduces ground contact time
Reduces stride length
The best way to achieve an increase in your cadence is by using GPS watches, phone applications or by simply running on a treadmill.
Eliminate a crossover running style – On a track, run straddling a line across 2 lanes or alternatively, try and maintain a space between your knees with every stride.
How to beat shin splints using strength
Strength exercises for shin splints should aim to improve the localised muscular capacity of the calf complex as well as the bone load capacity of the Tibia. This is best addressed with weight bearing functional exercises that mimic running postures.
One of the most important and often forgotten muscles of the calf complex is the Soleus. The soleus muscle is vital for absorbing excessive loads placed on the Tibia during running by minimising excessive pronation as well as resisting the bending forces experienced by the Tibia due to ground impact.
The best Soleus exercise that runners can do is the Bent Knee calf raise (pictured above). To perform the exercise correctly:
Bend your knee as far forward as possible, keeping your foot flat on the floor
Keeping your knee bent, raise yourself up onto your toes
Lower your heel back to the ground
Perform 3 sets of 15 repetitions in a slow and controlled manner.
As always, if you are having problems, please do not hesitate to contact one of our experienced physiotherapists.
A comprehensive rehabilitation programme guided by a Surgeon and physiotherapist will enhance recovery following surgery and facilitate return to sport/Exercise. General aspects of the post-operative rehabilitation and goals are listed below:
Range of Motion (ROM)
Restoring pre-injury range of motion improves surgical outcomes and minimises the chances of scarring within the knee. There is a particular focus on restoring full knee extension early.
Walking and running gait
Muscle imbalances/dysfunction is common in the early stages following ACL reconstructive surgery. This leads to altered gait mechanics with reductions in stride length, altered swing and stance phases together with weak/uncoordinated firing of hip, knee and ankle musculature.
Early weight bearing attempts to restore gait mechanics in a timely fashion and reduce the incidence of anterior knee pain.
Treadmill rehabilitation (mid-stage) is a good way of normalising joint motion of the lower limb. Backwards walking in particular, strengthens the quadriceps while minimising anterior knee pain. This also provides for sport-specific training requiring backward locomotion.
Muscle strengthening and endurance training
Muscle contains Type 1 (endurance) and Type 2 (fast-twitch) fibres in varying amounts. Following ACL injury, these fibres show signs of atrophy (wasting away) and changes in cellular composition. Therefore, ACL rehabilitation requires focus on both these different types of fibres namely; low-load/high repetitions (endurance) and high-load/low repetitions (strength)
Exercise quality is key
It is imperative NOT to begin new exercises prior to neuromuscular readiness.
If certain muscle groups remain weak, this leads to compensation which in turn produce faulty movement patterns. If these faults are not corrected, this may perpetuate the original weakness.
Neuromuscular/Proprioceptive retraining.
Neuromuscular control is often altered following ACL injury and surgery. Specific exercises activate receptors within the knee joint which in turn trigger compensatory muscle activation patterns to aid knee stability. These exercises should commence early following surgery to promote neuromuscular integration which help with gait training and muscle strengthening. Functional outcomes highly correlate with balance and proprioception following ACL reconstruction.
Stages of Rehabilitation
Weeks 0-2
Goals
Manage Pain and post operative swelling
Establish Range of motion (0-90°, Full Extension a priority)
Retrain gait pattern
Re-establish muscular control of quadriceps, hamstrings and calves